


Table of Contents
- Before You Start: Understanding Your Legal Position
- Hairline Cracks vs. Structural Damage: What You're Actually Looking At
- How to Fill Hairline Cracks in Plaster: Step-by-Step
- Best Filler for Rental Wall Repairs: Materials That Work
- Documenting Damage and Reporting to Your Landlord
- Protecting Your Security Deposit When Repairing Cracks
- Common Mistakes to Avoid
- Conclusion
- Frequently Asked Questions
Last Updated: September 1, 2026
Before You Start: Understanding Your Legal Position
Fixing minor wall cracks in a rented flat sits in a legal grey area. Your tenancy agreement likely contains clauses about property condition and maintenance. In most UK tenancies, landlords are legally responsible for structural repairs under the Landlord and Tenant Act 1985, but "structural disrepair" is defined narrowly (legislation.gov.uk). A hairline crack in plaster usually doesn't qualify.
If you attempt repairs without permission and something goes wrong, you could lose part or all of your security deposit. The documentation you create now becomes evidence in any dispute.
The safest path is to report the damage to your landlord in writing first, document it with photographs, and only proceed with repairs if you get explicit written consent. If they don't respond within 14 days, you have grounds to proceed, but only after making a formal attempt to involve them (gov.uk).
Hairline Cracks vs. Structural Damage: What You're Actually Looking At
Not every crack in plaster signals a problem. Learning to distinguish between cosmetic damage and something serious saves you time, money, and unnecessary worry.
Hairline cracks are thin, spider-web-like fractures less than 1mm wide, running in no particular direction and confined to a small area (peer-reviewed research). These are almost always cosmetic, caused by normal building settlement, plaster aging, or humidity shifts.
Structural cracks are wider (typically 3mm or more), often diagonal, and may appear in patterns. They can indicate subsidence, building movement, or moisture problems. These require professional assessment and landlord involvement; never attempt DIY repair on structural damage.
Identifying hairline cracks in plaster
Use a ruler or coin to check the crack's width. If it's barely visible or thinner than a human hair, you're dealing with a hairline crack. Check the direction: hairline cracks often run randomly across a wall surface, not following structural lines like window edges. If a crack runs diagonally from a window corner downward, that's a different issue.
Feel the edges by running your finger gently along the crack. A hairline crack feels smooth with minimal separation between plaster surfaces. If you feel a step or significant gap, or if the plaster feels loose, the damage is more serious.
Look at the surrounding wall. If the plaster is solid with no other signs of damage, bulging, water stains, or additional cracks nearby, you're likely looking at cosmetic wear caused by normal settlement.
When a crack signals something serious
Diagonal cracks running from window corners downward often indicate building movement or subsidence and require professional assessment. Cracks wider than 3mm need attention. Multiple cracks in the same area, or cracks that reappear after filling, indicate an underlying problem the building is still moving or settling.
Water stains around or below a crack suggest moisture issues. Damp can compromise plaster integrity and indicates problems with the building envelope. This is a landlord responsibility.
If uncertain, photograph the damage with a scale reference (coin, ruler, or your hand) and send it to your landlord in writing, asking them to confirm whether it's cosmetic or requires professional assessment. This protects you either way.
How to Fill Hairline Cracks in Plaster: Step-by-Step
Filling a hairline crack is straightforward if you follow the process carefully. The goal is to create a smooth, invisible repair that won't shrink, crack again, or damage the plaster when you move out.
What you'll need
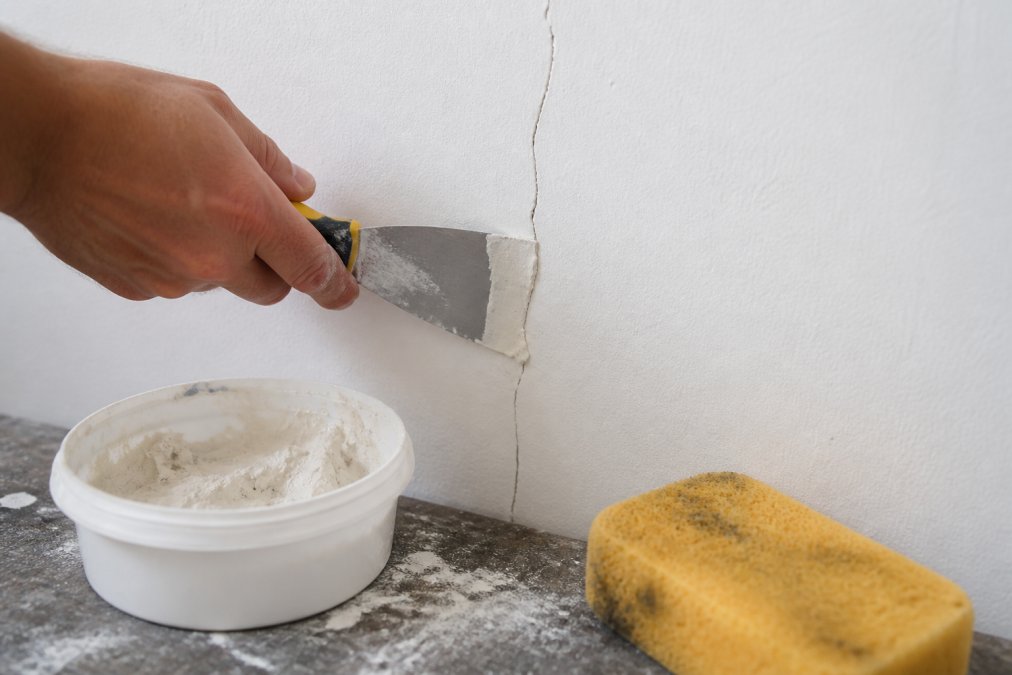
You need a filling knife (approximately 5-7.5 cm wide), joint compound or spackle, a damp sponge, and fine-grit sandpaper (120-150 grit). Joint compound (also called drywall compound or "mud") works well for plaster walls. It's designed to bond with plaster, dries hard, and sands smoothly. Both joint compound and spackle are readily available and inexpensive.
Preparing the surface
Clean the crack first using a dry brush or old toothbrush to remove loose plaster, dust, or debris. Don't be aggressive, just clear the channel so the filler makes solid contact with the plaster on both sides.
If the crack is dusty, dampen a cloth and wipe along it to remove fine dust. Let it dry completely before proceeding. For older plaster, lightly dampen the crack with a damp sponge just before filling. This prevents the dry plaster from pulling moisture out of the joint compound too quickly, which can cause shrinking and cracking as it dries.
Filling and finishing
Load your filling knife with compound. Press it firmly into the crack using a single smooth stroke along its length. One or two passes is usually enough for a hairline crack.
Immediately after filling, scrape off excess with a clean stroke perpendicular to the crack. Allow the compound to dry completely (typically 24 hours). Once dry, sand the area lightly with fine-grit sandpaper using gentle, circular motions to blend the repair with the surrounding wall.
If the repair has shrunk slightly, apply a second thin coat of filler, let it dry, and sand again. Two thin coats often produce better results than one thick coat.
Best Filler for Rental Wall Repairs: Materials That Work
The material you choose determines whether your repair looks professional. For rental properties, reversibility matters.
Joint compound is the industry standard for plaster repairs. It's designed to bond with plaster, dries hard, and sands to a smooth finish that accepts paint. It's inexpensive (typically under £5 for a tub) and available at any DIY store.
Spackle is similar but sets faster and is slightly more durable. It's better for small holes than long cracks and doesn't shrink as much.
For renters specifically, consider products designed for temporary or reversible repairs. The Quanolo range includes the WallWizard™ (£22.99), a specialised wall repair cream formulated to fill cracks and minor surface damage without the mess of traditional joint compound. It applies smoothly, dries quickly, and sands to an invisible finish.

Avoid caulk or silicone sealants. These remain flexible, create visible lines, and are harder to remove cleanly when you move out.
Documenting Damage and Reporting to Your Landlord
How you document and report damage is as important as the repair itself. Your landlord may dispute whether the crack existed before you moved in. Written documentation and photographs with scale references protect your security deposit.
Taking photographs with scale reference
Photograph the crack in good natural light. Place a scale reference in the photograph, a ruler, coin, or your hand gives context to the crack's size. Without scale, a landlord or dispute resolver can't assess whether the damage is hairline or serious.
Take multiple angles: one straight-on, one at an angle, and one showing the crack's location within the room. Include context photos showing the wall's location and overall condition, proving the damage is isolated.

Most phones timestamp photos automatically. The timestamp proves when the damage was documented and supports your claim that it was pre-existing.
Writing a formal report
Send a written report to your landlord immediately after discovering the damage. Email is fine and creates a record. Include the date, a description of the damage, and reference to the photographs you're attaching.
Use neutral language and avoid speculation about cause. Ask your landlord to confirm whether the damage is their responsibility or yours, and whether you have permission to repair it. If they don't respond within 14 days, you've made a good-faith attempt to involve them.
Here's a template you can adapt:
Dear [Landlord Name],
I've discovered a hairline crack in the plaster [location] on [date]. I've attached photographs showing the damage with a scale reference.
Please confirm whether this is a pre-existing condition or damage that occurred during my tenancy. I'd also like to know whether I have your permission to repair this minor cosmetic damage myself, or whether you'd prefer to arrange professional repair.
I look forward to hearing from you within 14 days.
Kind regards, [Your name]
Keep a copy of this email and the photographs. If a dispute arises later, you have proof you reported the damage and sought permission.
Protecting Your Security Deposit When Repairing Cracks
Your security deposit is at risk if your landlord claims you caused damage or failed to maintain the property. Minor surface cracks in plaster are generally considered normal wear and tear, not damage you're liable for. However, if your landlord can argue that you caused the crack through negligence or misuse, they can deduct from your deposit.
Documentation is crucial. If you report the crack in writing with photographs before attempting repair, you've established that it was pre-existing. Your landlord can't later claim you caused it.
When you repair the crack, use reversible methods. Joint compound and spackle are reversible and can be sanded out completely if needed. Avoid permanent alterations like painting over the repair with a different colour.
Keep receipts for any materials you purchase. Before you move out, inspect the repaired area. If the repair is visible or the plaster is damaged, sand it smooth and touch up with paint that matches the surrounding wall.
If the repair shrinks or cracks again after completion, photograph it and report it to your landlord before you move out. This prevents them from claiming you caused new damage during move-out.
Common Mistakes to Avoid
The most frequent error is applying filler too thickly in a single coat. Joint compound shrinks as it dries, and thick applications can crack or sink below the wall surface. Use two thin coats instead of one thick one.
Another mistake is filling the crack without cleaning it first. Dust and loose plaster prevent good adhesion. Always brush and dampen the crack before filling.
Sanding too aggressively or too early is common. If you sand before the compound is completely dry, you'll tear it rather than smooth it. Wait the full drying time, then sand gently.
Skipping the primer and paint step leaves the repair visible. Joint compound is porous and absorbs paint differently than surrounding plaster. Always prime and paint the repaired area.
Using the wrong filler material is another trap. Caulk, silicone sealant, or waterproof compounds don't sand smooth and create visible lines. Stick with joint compound or spackle designed for plaster.
Finally, avoid repairing damage without landlord knowledge or permission. Even if the repair is successful, your landlord might claim you altered the property without consent.
Conclusion
Minor wall cracks in rental flats are common, manageable, and usually not your responsibility. The key is documenting the damage, seeking written permission from your landlord, and using reversible repair methods that won't jeopardise your security deposit.
Protecting your deposit starts with the right approach to repairs. Quanolo's WallWizard™ (£22.99) and RenovaSeal™ (£19.95) are specifically designed for rental properties, offering reversible, professional-grade repairs that won't damage the underlying surface. Both products dry hard, sand smooth, and accept paint seamlessly, leaving no trace of repair when you move out.
Frequently Asked Questions
Q: Are tenants responsible for fixing wall cracks in a rental property?
A: Responsibility depends on the cause. If a crack results from normal settlement or building movement, your landlord must repair it under their obligation to maintain the property in a habitable condition. If you caused damage through negligence, you may be liable. Minor cosmetic cracks from minor impact are typically a landlord responsibility unless your tenancy agreement specifies otherwise. Always check your contract and report damage in writing to protect yourself.
Q: Will filling a small wall crack cost me my security deposit?
A: Not if you do it correctly and reversibly. Professional-quality repairs using standard joint compound and paint matching are considered maintenance, not damage. The risk arises if your repair is visibly poor, uses non-standard materials, or cannot be easily undone. Document your repair with photographs before and after, keep receipts for materials, and inform your landlord in writing. This creates a record protecting your deposit against deduction claims.
Q: What's the difference between a hairline crack and one that signals structural issues?
A: Hairline cracks are typically less than 1 mm wide, run in single directions, and appear on plaster or drywall surfaces. Structural cracks are wider (3 mm or more), often diagonal, appear in multiple locations, or widen over time. Diagonal cracks, cracks wider than 5 mm, or those accompanied by sticking doors or uneven floors indicate subsidence or building movement requiring professional inspection. When in doubt, photograph the crack and report it to your landlord rather than attempting a DIY fix.
Q: Should I notify my landlord before fixing minor wall cracks myself?
A: Yes. Write to your landlord describing the crack, its location, and your proposed repair method. This demonstrates good faith, protects your deposit, and creates a written record. Some landlords prefer to handle repairs themselves; others welcome tenant initiative on minor cosmetic work. If you proceed without notification and the repair fails or causes issues, you risk deposit deduction. Keeping communication in writing (email) ensures both parties have documentation.